- Home
- Computer Info
- How To Install A Sound Card
How To Install Sound Card Instructions
Stephen Harrison B.Sc. (Hons), M.Sc., MBCS, CITP
Understanding how to install sound cards is useful knowledge to improve your computer's audio input, such as through a microphone, and output, such as external speakers or headsets.
Modern computer systems already have good quality built-in sound cards that are part of your systems motherboard. In addition, modern system also come with good quality speakers and often with good microphones too. They are usually more than enough for everyday use.
However, if you are heavily into gaming, or producing and edit music, for example, then consider investing in a good quality sound card.
This article walks you through the simple steps of physically installing a sound card. We take a look at the prerequisite steps to keep you and your system safe. We then review the steps to insert your new sound card and reassemble your machine.
Keep up with the latest news and developments
Sign up to the eComputerZ Newsletter
The free A to Z of performing BIOS updates guide that anyone can follow.
✔ A checklist of important actions to perform throughout the update process.
✔ Further supporting information to aid your update plans.
✔ My unique approach for sourcing the latest BIOS versions for any motherboard manufacturer.
Sign up below for instant access to the guide, or by going to the Subscription page for more details.
I never share information with third parties and your details are secure.
I aim to issue newsletters at the start of each month.
Contents
Steps To Take Before Installing Your Sound Card
The how to install sound card process is straightforward, but can be daunting if you have never done it before. Therefore, I have outlined the basic sound card installation steps, and included a 10-minute video demonstrating the entire process at the end of the article.
If a picture is worth a thousand words, a video must be worth much more, right? The video is from a typical home PC user. I think it captures the steps well.
You will find installing a sound card is straightforward after working your way through this article. This gives you the confidence to try it for yourself and save yourself tome and money paying someone else to do it for you.
The first step is important if you do not already have a dedicated sound card already installed inside your device.
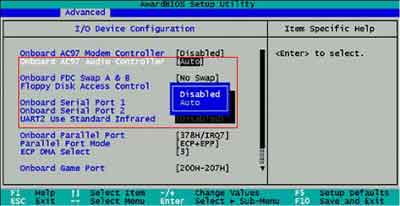
Restart, or switch on your computer, and enter your BIOS to disable the integrated sound card. This can also be known as the onboard audio controller.
If you miss this step out, then you run the risk of your sound card not working properly.
 How To Install Sound Card Article
Disable Onboard Audio Controller Example
Next, switch off your computer and unplug it from the wall. Also unplug your monitor, keyboard, mouse and any other peripherals you have connected to your machine, e.g. printer, USB pen etc.
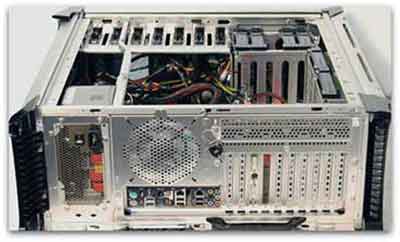
Remove the top of your computer case. How you do this depends on the type of computer chassis you have. You may need to remove some screws, push two buttons at each side of the case, and/or lift a leaver. Refer to your computer manual to work out how to do this.
If you have a tower chassis, lay it on its side, motherboard down, then remove the side panel.
 How To Install Sound Card Article
Open Tower Chassis With Side Panel Removed
Put the screws, or anything else that needs to be re-attached to your PC case, in a safe place, so you don't lose them. From experience, I can tell your computer case screws grow legs and run away!
I use a pill box to put all of my screws in one place. This way I know which screws belong to which computer or component. Take a look at the computer repair technician tools article for more details.
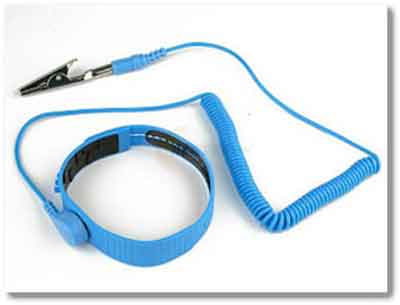
Before you get your hands dirty inside your machine, I recommended as a minimum wearing an anti-static wristband. This prevents static build up which can damage the computer hardware components inside your machine.
If you don't have an anti-static wristband, buy one. Alternatively, you can touch a metal object to ground yourself. If you do this, make sure you do it properly.
Take a look at the PC repair tools article which looks at the damage electrostatic discharge can be caused to your machine, and the options you have available to protect you and your device.
 How To Install Sound Card Article
Wristband For Protection Against Static Electricity
In the next section of this article, we take a look at the step to install your sound card correctly.
Return to the Table of Contents
How To Correctly Install Your Sound Card
If you are replacing an existing audio card, remove the screw that pins the sound card to the computer case, then remove it by carefully pulling it from the PCI slot with both hands.
Be careful when removing internal components. Don't bend the card. Pull it vertically. If it is difficult to remove, pinch either end of the component and rock it until it comes loose.
If there is no existing sound card, identify which PCI slot you are going to use. If possible, pick one that has the most surrounding space.
For example, if I have 3 free PCI slots next to each other, I'll use the middle one. This is because the audio card will have the maximum exposure to your computer's internal airflow, keeping the component cool. It also makes internal cleaning of your machine easier.
Next, remove the metal plate for the identified PCI slot. A screw may need to be removed. In some PCs, you push the metal plate out of position.
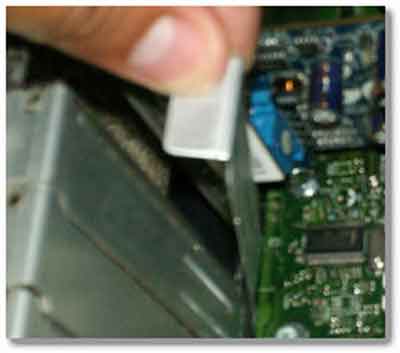 How To Install Sound Card Article
A Computer Blanking Plate Being Removed
Next, insert your new sound card and align it correctly with the PCI slot. The 'gap' in the PCI sound card connector aligns with the raised bit(s) in the PCI slot.
Look at the PCI slot image with the red boxes below. The gap in the sound card PCI connector align with the highlighted raised bits on the PCI slot.
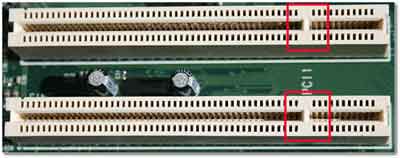 How To Install Sound Card Article
Peripheral Component Interconnect (PCI) Slots
Sometimes they have more than one gap. This is OK. Just align the raised bit with the appropriate gap if only one exists.
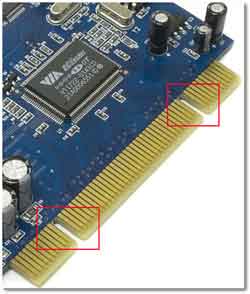 How To Install Sound Card Article
A Close Up Of The PCI Connectors On A Sound Card
Next, carefully push or rock the sound card gently into the PCI slot. Make sure both ends of the card are firmly clipped in place. You should be able to see the sound card ports on the outside of your machine.
If your modern computer has a CD/DVD drive, connect it to your new sound card, if applicable. The audio cable comes with the CD/DVD drive.
Connect one end of the audio cable to the CD-In socket on the card, and the other end into the Audio Out socket on your CD/DVD drive. Each part is highlighted in the images below.
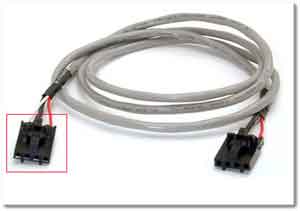 A Close Up Of A CD/DVD Audio Cable
 A Close Up Of A CD/DVD Audio Out Port
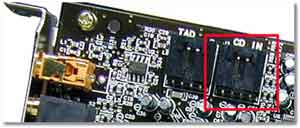 A Close Up Of A Sound Card CD In Port
Next, screw the new sound card to the computer case and then put the computer case back together. You are confident this will work first time, right?
IT technician professionals will leave the case open and test the new device before putting the case back together. This is because it saves time if there is a reason to remove or replace the component.
Reconnect all your peripherals: Keyboard, Mouse, Monitor, Printer, Speakers etc., and replace the computer chassis lid/case as required. That's it. Job done.
Return to the Table of Contents
How To Install Sound Card | Final Thoughts
This article shows you just how straightforward the process is. The next step is to switch on your machine and install the sound card drivers.
If you find the steps above a little confusing, I recommend watching the video below. It will hopefully clarify the sound card installation process for you.
How To Install Sound Card Video
If you experience any issues with your new audio card, take a look at the sound card not working article.
If you would like to read more about the how to install a sound card process, take a look at the PC Hardware site for another description on how to install a sound card.
- Home
- Computer Info
- How To Install A Sound Card
